
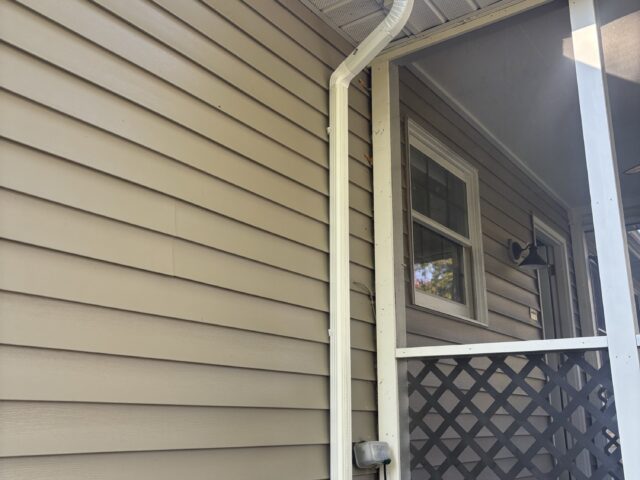
A homeowner in Mentor contacted Colin Can Help because water kept leaking from their gutter for days after every rain. When I inspected it, I found that the patio extension had never had a downspout added. Water was pooling at the gutter corner, where the sealant had deteriorated.
The solution was to reseal the leaking area and install a downspout so the water had somewhere to go.
Why the Patio Gutter Was Leaking
The leaking corner was the visible problem, but the missing downspout was the underlying issue I identified during the inspection.
Without an outlet at that section of the patio gutter, water collected at the corner instead of draining out. Adding more sealant alone would have left that drainage problem in place.
We decided to add a new downspout, reseal the corner, and direct the discharge away from the foundation.
What the Downspout Installation Included
I supplied the parts, handled the installation, and cleaned up the work area. The job included:
-
Cutting an outlet opening in the existing gutter.
-
Measuring and cutting 2-by-3-inch downspout sections to fit.
-
Fitting the elbows around the patio framing.
-
Securing the downspout along the wall.
-
Resealing the leaking gutter corner and sealing the new connections as needed.
-
Installing a bottom extension to discharge water approximately six feet away from the foundation.
-
Cleaning up the installation area.
The project took about two to three hours in total.
Giving the Water Somewhere to Go
The new downspout provided an outlet for water that had been collecting in the patio gutter. The extension at the bottom routed that water approximately six feet away from the house instead of discharging it directly beside the foundation.
This repair addressed both the deteriorated sealant and the missing drainage outlet. The goal was to correct the reason water was collecting, not just patch the spot where it escaped.
Follow-Up After the Installation
I don’t water-test freshly applied gutter sealant immediately because it needs time to set properly.
Instead, I ask homeowners to watch the repaired area when it rains and contact me if they notice any leaking. If there’s an issue, I’ll come back out, inspect it, and make sure everything is right.
For this project, the installation and sealing were completed, with the homeowner asked to monitor the area during future rain. A post-rain result had not yet been confirmed.
How Much Does a Downspout Installation Like This Cost?
This Mentor project was approximately $375, including materials, delivery, installation, gutter sealing, a discharge extension, and cleanup.
For comparable new installations, Colin Can Help currently budgets approximately $350 to $450, depending on access, downspout routing, and any additional gutter repairs. Each project is quoted for its specific scope.
If your gutter keeps leaking after rain or a patio addition needs a downspout, send a photo or video of the problem. Include the gutter, the leaking area, and where the water currently drains so I can get a better idea of what needs attention.
Text a photo or video of what you need help with to 216-800-5883.

