

Short Answer
Between tenants, work through the bathroom in this order: check for leaks, check the toilet’s insides, test the exhaust fan, tighten and test the hardware and fixtures, look over the grout, paint, and recaulk last. A bathroom in decent shape is usually a few hours of basic work plus caulk cure time. The items that cost real money later are slow leaks, failed caulk and a fan that doesn’t actually pull air, so don’t skip those just because the room looks clean.
This box contains affiliate links. As an Amazon Associate I earn from qualifying purchases. See the affiliate note at the bottom of this post.
🧰 What You’ll Need
What I Use:
Recaulking is the single most common bathroom turnover job. This is the caulk I keep on hand for it.
Check price →
For loosening and tightening faucet nuts up behind a sink, where a regular wrench won’t fit.
Check price →
Helpful Picks: these are well-reviewed, generic options, not my personal picks. Check that a flapper or fill valve fits your toilet before you buy, since sizes vary by model.
Last updated: November 2026
Why the Bathroom Gets Its Own Turnover Checklist
Most of a rental turnover is cosmetic. The bathroom is different because it’s where water problems hide. Tenants often don’t report a toilet that runs now and then, a damp cabinet floor, or a fan that just hums. Turnover is the one time the room is empty and you can check everything without working around someone’s schedule.
The order below is deliberate. You find the leaks and broken parts first, do the messy work in the middle, and finish with paint and fresh caulk so nothing gets damaged after it’s done.
Before You Start: What to Bring
- A good flashlight and a roll of paper towels (for dry-towel leak checks)
- A screwdriver set, an adjustable wrench and a basin wrench
- A utility knife or razor scraper, rubbing alcohol and painter’s tape for caulk
- Food coloring for the toilet dye test
- A spare flapper that fits the toilet, if you know the model
- Kitchen-and-bath caulk and a caulk gun
The Checklist, in Order
1. Leak check first
- Under the sink: Wrap a dry paper towel around each shut-off valve, supply line connection and drain joint. Run the hot and cold water for a minute or two, then check the towels. Look at the cabinet floor for swelling, stains or soft spots.
- Shut-off valves: Turn each one off and back on. Valves that haven’t moved in years can stick or start weeping at the stem once you turn them. Better to find that with an empty unit than when a tenant calls at night with a leak they can’t stop.
- Supply lines: Braided stainless lines in good shape are fine. Old plastic, kinked or corroded lines should be replaced. If you don’t know how old they are, replacing them is cheap insurance.
- Toilet base: Gently rock the toilet. A wobble, a sewer smell, or staining or soft flooring around the base usually means the wax ring needs replacing and the toilet needs to be reset.
- Tub spout and showerhead: With the handle off, watch for drips. A steady drip from the spout or head usually points to the valve cartridge, which is a plumber job. Here’s more on why tub spouts leak.
- The ceiling below: If there’s a room or basement under the bathroom, look up. A stain under the tub or toilet is worth tracking down before anything else.
2. Toilet internals
- Dye test the flapper: Put a few drops of food coloring in the tank and don’t flush for 15 to 20 minutes. If color shows up in the bowl, the flapper is leaking and should be replaced.
- Listen to the fill valve: A toilet that hisses or refills on its own is wasting water. Check that the water level sits below the top of the overflow tube. Fill valves depend on the toilet, so match the replacement to what’s there.
- Check the chain, handle and seat: The flapper chain should have a little slack, the handle shouldn’t stick, and the seat bolts should be tight.
- Tank bolts: Look for drips where the tank meets the bowl.
If you’re not sure what each part does, I break it down in Understanding the Parts of a Toilet.
3. Exhaust fan
Turn the fan on and hold a single square of toilet paper up to the grille. It should pull the paper against the cover and hold it there. If it doesn’t:
- Turn off the power, pull the grille and vacuum out the dust. That alone fixes a lot of weak fans.
- If it’s still weak, the duct may be crushed, disconnected or never vented outside at all. A fan that blows into the attic just moves the moisture somewhere worse.
- A loud rattle or grinding usually means the motor is on its way out.
Tenants often don’t run the fan long enough. A timer switch helps keep moisture down between turnovers, and swapping the wall switch is a small job.
4. Hardware and fixtures
- Towel bars, toilet paper holder, hooks: Give each one a firm tug. Loose ones usually need new anchors or a move to a stud.
- Grab bars: If there are any, they need to be rock solid with no movement at all. A grab bar that moves is worse than none.
- Faucet: Check for drips and loose handles, clean the aerator, and make sure the drain stopper works. Here’s how to stop faucet leaks.
- GFCI outlet: Press test, then reset. If it doesn’t trip, or the outlet by the sink isn’t GFCI-protected, get that fixed before the next tenant moves in.
- Mirror, medicine cabinet and light: Make sure they’re secure and every bulb works.
- Door: It should latch, and the privacy lock should open from the outside in an emergency.
5. Grout
Look closely at the first row of tile above the tub and the corners of the shower. Sound grout that’s just dirty can be cleaned and sealed. Cracked, crumbling or missing grout lets water get behind the tile, and that’s how small problems turn into wall repairs. Regrouting isn’t something I take on, so if you need it, call a tile pro. One related tip: the corners where the wall meets the tub should be caulked, not grouted, because that joint moves.
6. Paint
Look for peeling paint above the shower, mildew spots on the ceiling and dings from towel bars. Clean any mildew and let the surface dry fully first. EPA’s mold guidance is clear: don’t paint or caulk over moldy surfaces. Prime stains with a stain-blocking primer, then use a paint made for bathrooms. I cover that in How to Choose Bathroom Paint That Resists Moisture, Mold, and Mildew, and for the whole unit, see Best Paint for Rental Properties. For trim and doors, here’s the best sheen for bathroom trim.
7. Caulk last
Check the tub and shower, the sink backsplash and around the vanity top. Replace caulk if it’s peeling, gapped or has black mildew under the bead. Mildew that has grown into the caulk won’t scrub out.
- Cut and scrape out all the old caulk. New caulk over old caulk doesn’t last.
- Clean the joint with rubbing alcohol and let it dry completely.
- Tape both sides of the joint for a clean line.
- Run a steady bead, smooth it, and pull the tape right away.
- Leave it alone for the full cure time on the tube before anyone showers.
Doing caulk last means nothing gets bumped or splashed while it cures, and the unit is ready when it’s done.
8. Final walkthrough
Run every fixture one more time, flush twice, and check the dry towels under the sink again. Take dated photos for your records. While you’re in the unit, test the smoke and CO detectors too. Here’s whether you can install a smoke detector yourself.
How Long It Takes
For a bathroom that’s in decent shape, the checks and small fixes are usually a few hours, plus the caulk’s cure time. Plan for more if a valve, supply line, wax ring or faucet needs replacing, or if the walls need patching before paint. Start the bathroom early in the turnover so the caulk has time to cure.
Common Mistakes
- Caulking over old caulk. It peels off within months.
- Painting over mildew. It comes back through the paint.
- Using painter’s caulk in the shower. Use a caulk rated for kitchens and baths.
- Skipping the fan test. A weak fan is a big reason bathroom paint peels and caulk mildews.
- Ignoring a toilet that runs “sometimes.” It’s usually a cheap flapper, and it only gets worse.
Safety Notes
- Shut off the water before you touch supply lines or valves, and turn off the breaker before working on the fan, light or outlets.
- Never mix bleach with ammonia or other cleaners.
- EPA says a moldy area larger than about 10 square feet, or mold after significant water damage, calls for more than a scrub and a coat of paint.
- If the building was built before 1978, assume old paint may contain lead. Don’t dry-sand or scrape it without following EPA lead-safe practices.
DIY or Call a Guy?
DIY: The dye test, a flapper swap, cleaning the fan, tightening hardware, cleaning and sealing grout, touch-up paint and recaulking are all reasonable jobs if you’re handy and have the time.
Call a handyman: Replacing shut-off valves and supply lines, resetting a toilet on a new wax ring, swapping a faucet or toilet, replacing a GFCI, re-anchoring hardware in tile, or repainting the whole room. These are where turnover time adds up fast if you’re also juggling showings.
Call a licensed pro: Drips from the tub or shower valve, slow drains and clogs, any leak inside a wall or stains on the ceiling below (plumber), cracked or missing grout and loose tile (tile pro), mold beyond a small patch (remediation), and fan ducting that needs new runs through a roof or wall.
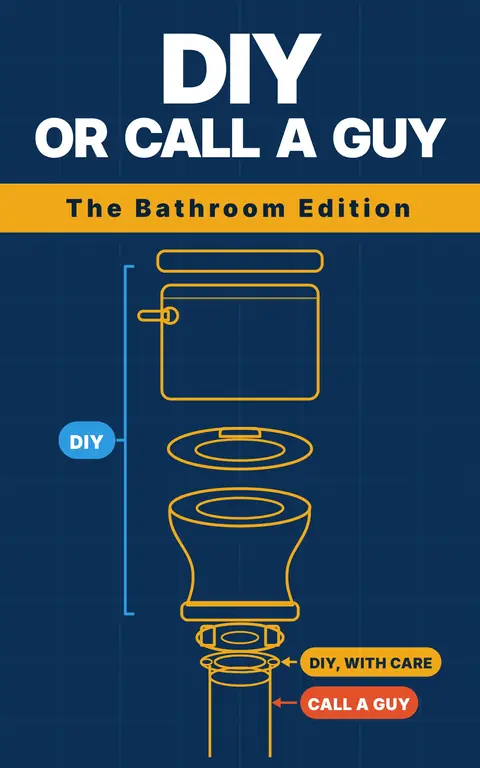
Not sure if a bathroom repair is a DIY job? I wrote a book for exactly that. DIY or Call a Guy: The Bathroom Edition covers 100+ bathroom problems, one page each, with a straight verdict plus the time, parts, skill level and what a pro would charge.
Local to Euclid or Cleveland’s east side? I handle rental bathroom turnovers myself, from toilet repairs and faucets to recaulking and bathroom painting. See my Handyman Services for Landlords in Euclid & Cleveland page, or text me a photo at 216-800-5883.
FAQ
How often should rental bathroom caulk be replaced?
There’s no set schedule. Replace it when it’s peeling, gapped or mildewed under the bead. Turnover is the natural time to check, since the shower can sit unused while new caulk cures.
Should I replace the toilet flapper at every turnover?
Not automatically. Do the dye test. If the flapper passes but feels hard or warped, it’s cheap enough to replace anyway.
Can I paint over mildew stains?
No. Clean the mildew, let the surface dry, prime with a stain-blocking primer, then paint with a bathroom paint.
What’s the most expensive thing to miss on a bathroom turnover?
A slow leak, usually under the sink or around the toilet base. It can quietly damage the cabinet, the subfloor or the ceiling below long before anyone reports it.

Scan to join our Loyalty Program, get a free coupon for your next service, and stay up to date on our services and articles.
Affiliate Note
Some of the links in this article are affiliate links. That simply means if you choose to buy through them, I may earn a small commission at no extra cost to you. As an Amazon Associate I earn from qualifying purchases. I only recommend products I trust and would feel comfortable installing in my own home or a client’s home.
If you try something I recommended and it turns out to be anything less than a five-star experience, please let me know. I always want these recommendations to be genuinely helpful.