The best way to paint your home’s interior is to start with thorough prep, choose the right paint type and sheen for each room, and apply it using proper techniques that deliver smooth, lasting results. Whether you plan to DIY or hire a professional, following the right process saves time, stress, and money.
Few home projects transform a space as quickly and affordably as interior painting. A fresh coat of paint can brighten a dark room, modernize an outdated color scheme, or simply give your home a cleaner, more polished look. But while painting seems simple, most homeowners discover it’s easy to end up with roller marks, peeling edges, or the wrong finish for the room.
This guide is designed to change that. I’ll walk you through everything you need to know about painting the inside of your home—from planning and choosing the right materials, to the step-by-step process we use, to deciding when it makes sense to hire help. Along the way, I’ll link to deeper guides on specific topics like how to avoid roller streaks in a bathroom and what paint works best for dog owners, so you can dig in further where it matters most.
Whether you’re a DIY painter looking for pro tips, or a homeowner considering hiring a painting service, this cornerstone guide will give you the knowledge and confidence to get the results you want—and avoid the mistakes that cost time and money.
Colin’s Complete Guide to Interior Painting
Section 1: Planning Your Interior Painting Project
Step 1: Understand the Space and How It’s Used
Every room serves a purpose, and how it’s used should shape your painting plan. A busy kitchen or hallway needs durable, easy-to-clean finishes, while a guest room can prioritize appearance over toughness. A home office has its own set of needs—colors that help focus and finishes that look good on camera during video calls. (See our guide to the Best Paint for a Home Office for workspace-specific ideas.)
Step 2: Identify Surface Repairs and Prep Needs
Before you think about paint, take a hard look at the condition of your surfaces. Small cracks, nail pops, or peeling areas may need patching and sanding. Glossy trim and doors often require scuff-sanding so new paint adheres properly. Planning this upfront prevents problems like peeling, bubbling, or uneven coverage later. If you’re not sure what kind of wall issues you’re seeing, our breakdown of different types of wall cracks will help you know when it’s just cosmetic and when it’s something bigger.
Step 3: Evaluate the Lighting
Lighting transforms how paint looks. Natural daylight shows the truest shade, but it changes throughout the day—warm in the morning, cooler by afternoon. Artificial lighting shifts things even more: soft white bulbs make warm tones glow, while daylight LEDs sharpen blues and grays. Always test paint samples on multiple walls to see how they react to your room’s lighting. For spaces with tricky or low lighting (like many bathrooms), application technique also matters—see our article on avoiding roller streaks and marks in bathrooms for tips that apply in any dim space.
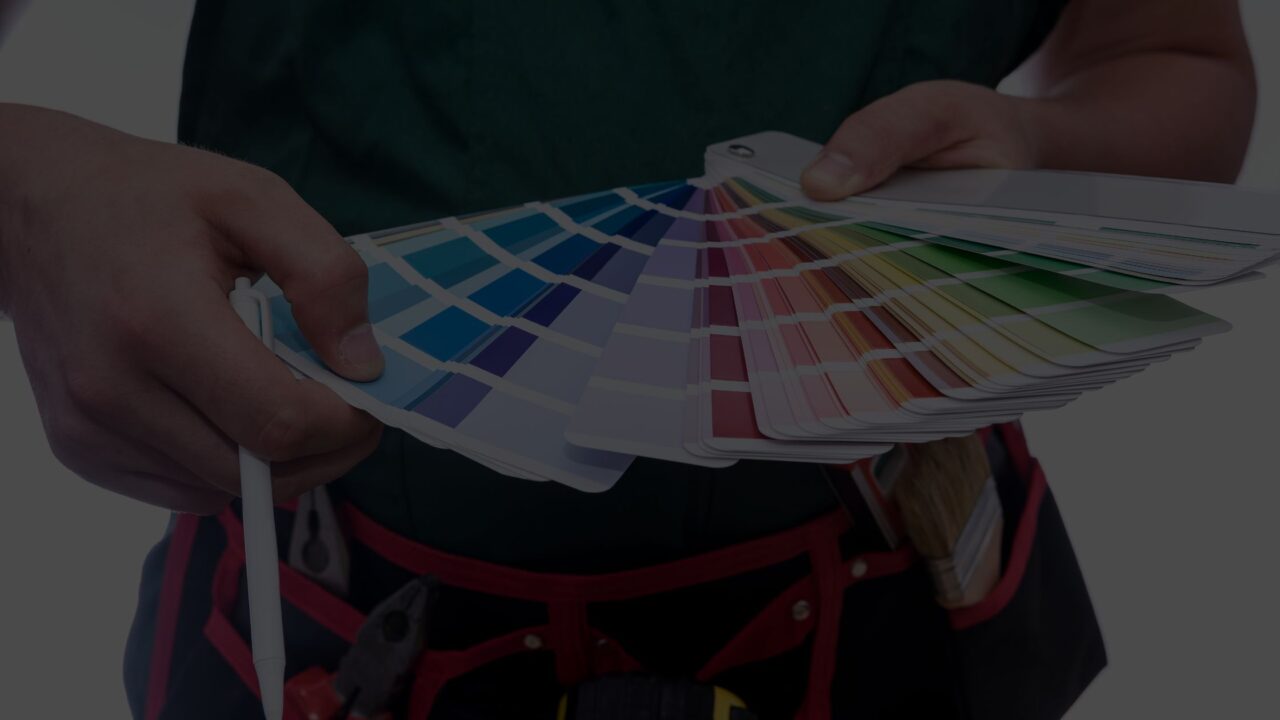
Step 4: Choose the Right Paint Finish
Once you’ve understood the space, surface condition, and lighting, you can choose the right finish (or sheen):
-
Flat or Matte – Great for hiding imperfections, but not washable.
-
Eggshell – A soft glow that works in most living spaces.
-
Satin – Durable and scrubbable, ideal for hallways, kitchens, and kids’ rooms.
-
Semi-Gloss / Gloss – Hard-wearing and easy to clean, perfect for trim, doors, and bathrooms.
Sherwin-Williams Cashmere® is one of my favorite paints and it uses its own luster names: Flat = matte, Low Luster ≈ eggshell, Medium Luster ≈ satin. For most households, Low or Medium Luster balances beauty with everyday durability. If you’re painting a high-moisture room like a bathroom, check our bathroom ceiling sheen guide for moisture-resistant options.
Step 5: Select Colors and Surfaces to Paint
Now comes the creative part—color. Cool tones (blues, grays) create calm, while warmer hues (terracotta, beige, sage) bring comfort and richness. Neutrals remain the safest bet for versatility and resale value. In open-concept homes, plan for how colors will flow between rooms to avoid a chopped-up feel.
But don’t stop with walls. A complete paint plan looks at every surface:
-
Walls – Your main canvas and backdrop.
-
Ceilings – Keep them white for height, or match wall color for a larger feel. (See our bathroom ceiling guide for examples.)
-
Trim & Doors – Often painted white or a crisp neutral to frame the walls, though bold door colors are trending.
-
Cabinets & Built-Ins – A cost-effective way to refresh kitchens, baths, or offices.
-
Accent Walls – A smart way to add color without overwhelming the room, especially useful in offices or bedrooms.
For pet owners, consider washable mid-tones that hide paw prints and smudges—see our guide to the Best Paint for Dog Owners for more on durability.
Step 6: Budget, Timeline, and Long-Term Maintenance
Finally, ground your plan in reality. A gallon of quality paint covers about 350–400 square feet, but most rooms need two coats. Add in primer, brushes, tape, drop cloths, and patching supplies, and costs add up fast. Time is just as important: a professional can paint a bedroom in hours, while a DIYer may need a full weekend. Whole-house interiors often take a pro crew a week but can drag into months for homeowners working evenings and weekends.
Season and ventilation also matter. Summer allows open windows but adds humidity and pollen; winter keeps windows closed but low-VOC paints and fans make it workable. And don’t forget long-term care—flat finishes look flawless at first but are tough to maintain, while satin and semi-gloss hold up better in high-traffic homes.
👉 With space use, surface condition, lighting, finishes, colors, surfaces, budget, and maintenance all accounted for, you’ll head into your project with clarity and a far better chance of getting lasting results that look professional.
Section 2: Build Your Painter’s Toolkit
A good paint job doesn’t just come from steady hands—it comes from having the right tools from the start. Pros rely on a proven set of brushes, rollers, ladders, and prep gear that make every project smoother, cleaner, and faster. If you’re planning to tackle multiple rooms or paint regularly, investing in quality tools pays off.
But if this is a one-time project—say, repainting a single bedroom—it’s worth pausing. By the time you buy paint, brushes, rollers, drop cloths, tape, ladders, and patching supplies (not to mention the weekend or two it’ll take), hiring a professional may actually be the more cost-effective choice. The good news: whether you DIY or hire it out, knowing what goes into a proper toolkit will help you understand the process and spot the difference between a rushed job and a professional finish.
The Core Tools
These are the non-negotiables you’ll reach for on every project:
-
Quality brushes – A 2–2.5″ angled sash brush is perfect for cutting in around trim and ceilings. A cheap brush sheds bristles and leaves uneven edges. My favorite angled brush is the Wooster Shortcut.
-
Rollers and covers – A standard 9″ roller handles most walls. Match the roller nap to the surface (¼–⅜” for smooth walls, ½–¾” for textured). Always buy an extension pole—it speeds up ceilings and saves your shoulders.
-
Ladders and step stools – Unless every room in your house has 7-foot ceilings, you’ll need a way to reach higher spots. A sturdy step stool works for trim and closets, while a versatile multi-position ladder from Lowe’s can handle ceilings, staircases, and tall walls. For big projects, scaffolding is worth considering.
-
Drop cloths or floor protection – Canvas cloths last forever and won’t slide around like plastic. Use plastic for covering furniture, canvas for floors.
-
Painter’s tape – Prevents paint bleed and helps achieve crisp edges.
Prep and Repair Gear
Painting is 50% prep, 50% paint. Without these, even the best paint will fail:
-
5-in-1 painter’s tool – The Swiss Army knife of painting: scraper, putty knife, can opener, roller cleaner, and more.
-
Putty knives and spackle – For patching nail holes and small dents. Keep a 1.5″ and a 6″ knife for different jobs.
-
Caulk and caulk gun – Seals gaps between trim and walls for a polished, seamless look.
-
Sandpaper or sanding sponges – Smooth patched areas and scuff glossy surfaces so paint sticks.
-
Cleaning supplies – A bucket, mild soap (or TSP for grease), and rags are essential for cleaning walls before painting.
(Not sure how much repair your walls need? Our guide to different types of wall cracks explains what’s safe to patch and what needs bigger attention.)
Upgrade Tools for Faster Results
If you want to make the job easier—or feel more like a pro—these are worth adding:
-
Extension poles – Save time and back strain when rolling walls and ceilings.
-
Work lights – Portable LEDs highlight flaws you’d miss in dim corners.
-
Paint sprayer – Great for cabinets, trim, or large open spaces, but requires masking skill.
-
Multi-tool or utility knife – Handy for cutting tape, scoring edges, or opening caulk tubes.
Don’t Skimp on Paint and Materials
Paint itself is the heart of the job, and quality matters. Bargain paint often requires extra coats and doesn’t stand up to cleaning. For walls, Sherwin-Williams Cashmere® or Duration® Home are excellent mid-range choices. For trim, doors, or cabinets, Emerald® Urethane Trim Enamel gives a smooth, furniture-like finish.
If you’re just starting out, Lowe’s carries starter paint kits with trays, liners, brushes, and rollers bundled together. They’re fine for small projects, but if you’re doing multiple rooms, upgrading to pro-quality tools pays for itself quickly. (You can shop all ladders and painting supplies at Lowe’s to build your kit.)
👉 With the right toolkit, you’ll spend less time fixing mistakes and more time watching your space transform. In the next section, we’ll cover prep work—the behind-the-scenes step that makes or breaks your results.
Section 3: Prep Work (The Secret to a Professional Finish)
If there’s one thing that separates professional results from weekend warrior mistakes, it’s prep work. Skipping or rushing this stage almost guarantees problems like peeling, uneven coverage, or messy edges. The good news? With the right approach, prep doesn’t have to be complicated—it just needs to be thorough.
Clear and Protect the Room
Start by removing as much furniture as possible. Anything left in the room should be pulled to the center and covered with plastic or canvas drop cloths. Floors do best with canvas cloths or rosin paper, which stay in place better than plastic and won’t become slippery under ladders. Don’t forget to remove outlet covers, switch plates, and vent grilles before painting begins.
(If you’ve got pets, plan ahead—pros know to greet them first, then keep them safely out of the work zone.)
Clean the Surfaces
Paint sticks best to clean walls. Dust, fingerprints, and grease act like a barrier. For general rooms, a quick wash with mild soap and warm water is enough. Kitchens and bathrooms often need something stronger, like TSP (trisodium phosphate) or a degreaser.
After cleaning, wipe walls with a tack cloth—a slightly sticky cloth that picks up fine dust and lint. This step seems small, but it prevents dust bumps that ruin an otherwise smooth finish.
Repair Imperfections
A flawless wall starts with fixing flaws. Use spackle and putty knives to fill nail holes, small dents, and cracks. For larger damage, joint compound may be required with sanding between coats. Trim gaps should be caulked for crisp, seamless lines.
After repairs, sand everything smooth, then use a tack cloth or microfiber rag to remove the dust. Skipping this step leads to paint clinging to dust instead of the wall.
(If you’re unsure whether a crack is harmless or a bigger issue, see our guide on different types of wall cracks before painting over it.)
Prime Where Needed
Not every wall needs primer, but knowing when to use it makes a big difference:
-
New drywall – Always prime before paint.
-
Patched areas – Prevents flashing (shiny, uneven spots).
-
Stains – Water, smoke, or ink bleed without a blocking primer.
-
Color changes – Going light over a dark wall? Primer saves coats of finish paint.
For bathrooms, laundry rooms, and basements, choose a mildew-resistant primer for extra protection.
Tape, Edge, and Mask Smartly
Painter’s tape is a pro’s friend when used right. Apply it carefully to trim, baseboards, and fixtures, pressing down firmly to prevent paint bleed. For cabinets or built-ins, add plastic sheeting to protect interiors. Remove tape while the paint is still tacky for the sharpest lines.
Lighting and Ventilation
Good lighting is critical—set up portable LED work lights to spot missed patches or roller marks before they dry. Ventilation is equally important: open windows when possible, and use box fans or HVAC circulation to keep air moving. Modern low-VOC paints are much safer than older formulas, but airflow still helps drying and keeps odors down.
👉 Done right, prep may take as much time as the painting itself—but it’s the single biggest factor in whether your finished room looks professional or patchy. In the next section, we’ll cover how to actually apply paint like a pro, from cutting in edges to rolling walls without streaks.
Section 4: Applying Paint Like a Pro
With the prep complete, it’s finally time to put paint on the walls. This is where DIYers often think “the hard part is over”—but the truth is, technique makes all the difference between a professional-looking room and one that screams amateur. Here’s the system pros use to get clean, consistent results every time.
Follow the Right Order
Always paint from the top down:
-
Ceilings first – Avoid splatter ruining fresh walls.
-
Trim and doors next – These are easier to cut in cleanly before walls are done.
-
Walls last – The biggest surface gets finished last so everything ties together.
This order keeps drips, splatters, and overlaps under control.
Cutting In with Precision
Cutting in is the process of painting straight lines along ceilings, corners, and trim using a brush. For best results:
-
Use a 2–2.5″ angled sash brush.
-
Don’t overload—dip about a third of the bristles into paint and tap off excess.
-
Hold the brush like a pencil and keep your wrist steady.
-
Work in short, controlled strokes, extending only 3–4 feet before reloading.
-
Maintain a wet edge so brush strokes blend smoothly into roller-applied paint.
👉 Pro tip: Some painters “box out” a room by cutting in a full perimeter first, but beginners often do better cutting in one wall at a time so the brushed edge doesn’t dry before it meets the roller.
Rolling Walls Like a Pro
The roller is where DIY jobs often go wrong—too much paint, too little paint, or uneven pressure leaves streaks and lap marks. Here’s how to avoid them:
-
Load properly – Roll evenly in the tray and offload excess to avoid drips.
-
Apply in a “W” or “M” pattern – Spread paint in a zig-zag, then fill it in without lifting the roller. This ensures even coverage.
-
Overlap slightly – Always roll back into the wet edge of the last section to blend seamlessly.
-
Keep consistent pressure – Pressing harder won’t spread more paint—it just squeezes it out unevenly.
-
Work in small zones – A 3×3 foot area is manageable without letting paint dry out.
For ceilings, use an extension pole to keep pressure even and avoid roller lines. (See our detailed guide on avoiding roller streaks for troubleshooting tips.)
Knowing When to Brush vs. Roll
Not every surface needs a roller. Narrow trim, window sashes, and doors often look best brushed. Large, flat doors or cabinets may benefit from a foam roller or sprayer to get a furniture-smooth finish. Walls with heavy texture may require a thicker nap roller (½–¾”) to reach into grooves.
Number of Coats and Dry Time
Most interior projects require two coats for uniform coverage, especially if you’re changing colors. Always allow the first coat to dry fully—typically 2–4 hours, depending on temperature, humidity, and ventilation—before applying the second. Rushing leads to tacky, uneven layers and peeling.
If you’re covering a dark color with a light one, don’t fight through endless coats. A tinted primer can save a gallon of paint and hours of work.
Avoiding Common Mistakes
-
Overworking the paint – Brushing or rolling after the paint starts drying will pull it off the wall, leaving streaks and uneven sheen.
-
Not boxing paint – If you’re using more than one gallon, pour them together into a larger bucket (“boxing”) to avoid shade variations.
-
Ignoring edges and corners – Paint often dries thinner near edges; feather them out carefully when cutting in.
-
Skipping dry checks – Shine a work light across the surface at an angle to spot roller lines or missed patches before they fully dry.
(If you see bubbling or peeling after your first coat, check out our guide to paint bubbling and peeling—it’s usually a sign of poor prep or moisture issues.)
Final Walkthrough and Touch-Ups
Before cleaning up, do a slow walk around the room with strong lighting. Look for thin spots, missed trim edges, or roller lines. Keep a small angled brush handy with leftover paint for quick touch-ups. This 10-minute habit is what makes the difference between a “good enough” job and one that looks flawless.
👉 Painting might seem like the easy part, but doing it right takes technique, patience, and the discipline not to rush. In the next section, we’ll cover room-by-room considerations—because the best approach for a bathroom isn’t the same as for a living room or a home office.
Section 5: Room-by-Room Considerations
Every room in your house has different conditions and needs. The right paint for a steamy bathroom isn’t the same as what works in a bedroom or a busy hallway. Here’s how to approach each space like a pro.
Kitchens and Bathrooms
These are the hardest-working rooms in the house. Steam, grease, and splashes mean walls and ceilings need durable, washable finishes. Satin or semi-gloss paints stand up best to cleaning. Use a mildew-resistant primer on ceilings and around showers or sinks to prevent peeling.
(For ceilings specifically, check out our bathroom ceiling sheen guide to learn which finishes hold up in high humidity.)
Living and Dining Rooms
These are the spaces where appearance matters most. Since they usually see less wear and tear than kitchens, you can prioritize looks with softer finishes like eggshell or Sherwin-Williams Cashmere® Low Luster. For larger rooms, lighter neutrals make the space feel bigger, while accent walls in deeper tones add contrast and interest.
Bedrooms
Bedrooms are all about comfort. Neutrals, soft blues, and greens are calming choices. Eggshell or matte finishes work well since traffic is low and the softer look hides wall imperfections. Kids’ bedrooms may benefit from satin finishes for easy cleanup.
Home Offices
More homeowners are working from home than ever, and the right paint here matters. Choose colors that support focus and look professional on video calls. Accent walls behind the desk are a great way to add character without overwhelming the space. Sheens should stay low-luster to avoid glare. (See our Best Paint for a Home Office guide for colors and finish tips.)
Hallways and High-Traffic Areas
Hallways, mudrooms, and stairwells take a beating. Bags, hands, and pets constantly brush against walls, so durability is key. Satin or medium-luster finishes strike the right balance between looks and washability.
Trim, Doors, and Built-Ins
Trim frames your walls and deserves just as much thought as the main color. Crisp whites and off-whites remain timeless, but bold door colors—navy, charcoal, even black—are becoming popular. Always use a higher-sheen enamel for trim, doors, and cabinets so they resist chipping and clean easily. Sherwin-Williams Emerald® Urethane Trim Enamel is a go-to for this.
👉 By planning for each room individually, you’ll avoid the “one-size-fits-all” trap and end up with results that look intentional and hold up to daily life. Next, we’ll tackle the big question: when does it make sense to DIY, and when is hiring a pro the smarter choice?
Section 6: DIY vs. Hiring a Pro
Interior painting is one of those projects many homeowners think about doing themselves. On the surface, it seems simple: a few brushes, a weekend, and some paint. But as you’ve seen so far, a professional-looking finish takes time, patience, and the right tools. The real decision comes down to weighing your time, cost, and expectations.
When DIY Makes Sense
If you enjoy hands-on projects, have plenty of time, and only need to tackle a small, low-traffic room, DIY painting can be rewarding. Bedrooms, guest rooms, or accent walls are common DIY-friendly spaces. Just remember that by the time you buy paint, tools, drop cloths, ladders, and prep supplies, the costs add up.
(If you’re not sure what that list looks like, review our section on the Painter’s Toolkit—you’ll see how even “basic” supplies can eat into a budget for a one-off project.)
When Hiring Saves Time and Money
Larger projects—like full interiors, stairwells, or homes with tall ceilings—are where pros shine. What may take a DIYer three weekends can often be completed in three days by a crew with the right equipment. Professionals also know how to deal with problem areas: peeling paint, moisture damage, or tricky trim work that can frustrate even the most determined homeowner.
Most importantly, hiring a pro means you don’t spend nights and weekends painting. You get a consistent, high-quality finish and a faster turnaround.
The Value of Experience
Professional painters don’t just bring speed; they bring judgment. Knowing when to prime, how to feather in repairs, or how to pick the right finish for a bathroom ceiling are details learned through experience. That knowledge translates into paint jobs that last longer and look better.
Which Path is Right for You?
If you’re painting a single bedroom and don’t mind some trial and error, DIY is a great option. But if you’re looking at a whole home, need flawless results fast, or simply don’t want to spend weeks surrounded by ladders and drop cloths, it’s time to call in help.
👉 At Colin Can Help, we handle everything from prep to cleanup, using top-quality Sherwin-Williams products and professional techniques for long-lasting results. Learn more about our Painting Services and see how easy it is to get your home looking new again.
Section 7: After the Paint Dries – Maintenance & Touch-Ups
The final brush stroke doesn’t mean the project is finished. Fresh paint needs time to cure, and the way you treat it in the first days and weeks makes a big difference in how long it lasts. Professionals know that the “aftercare” is just as important as the application.
Curing vs. Drying
Most homeowners assume once paint feels dry to the touch, it’s ready for use. In reality, paint goes through two stages:
-
Drying – The surface is no longer tacky, usually after a few hours.
-
Curing – The paint film hardens fully, which can take 2–4 weeks depending on the product and room conditions.
During that curing window, avoid scrubbing walls or hanging heavy items that could stick and peel off fresh paint.
Early Care Tips
-
Keep furniture slightly pulled back from walls for the first week.
-
Be gentle when cleaning—only use a soft, damp cloth if absolutely needed.
-
Avoid taping decorations or hooks onto freshly painted surfaces.
Touch-Ups
Even with the best prep and application, touch-ups are sometimes needed. Scuffs, nail pops, or a missed roller line can show up once the paint fully cures. The key is to save a small amount of paint (sealed tightly) and keep a good brush or mini-roller handy. Apply lightly and feather out the edges so it blends seamlessly.
(In our painting services, we build in a short window for touch-ups after full dry time—so homeowners know they can call us if something needs a quick fix.)
Long-Term Maintenance
High-traffic areas like hallways and kids’ rooms will eventually need cleaning. Most satin or higher-sheen paints allow gentle scrubbing with soap and water. For flat finishes, avoid aggressive cleaning and instead plan for periodic repainting or spot touch-ups.
A good paint job should last 7–10 years in a bedroom or living room, and about 3–5 years in kitchens and bathrooms where humidity and cleaning wear it down faster.
👉 With the right care, your fresh paint will stay beautiful for years. In the next section, we’ll explore what painting really costs—and how to see the value in your investment.
Frequently Asked Questions About Interior Painting
🖌️ Paint Types, Finishes & Products
Q: What’s the best type of paint for interior walls?
For most interior walls, acrylic latex paint is the best choice. It’s durable, easy to clean, and dries quickly compared to older oil-based paints. Oil-based products used to be common but are harder to use, smell strong, and aren’t as environmentally friendly. Mid-range products like Sherwin-Williams Cashmere® give you professional results without breaking the bank.
Q: Do I always need primer before painting?
Not always, but in many cases primer is smart. If you’re painting new drywall, covering patched areas, or switching from a dark color to a light one, primer will save you extra coats of paint. Primer is also necessary for stained walls or surfaces with poor adhesion. If the wall is clean, in good condition, and a similar color, you may be able to skip it.
Q: What finish should I use in a bathroom or kitchen?
Bathrooms and kitchens need durable, washable paint because of moisture and grease. Satin and semi-gloss are best since they resist water and scrubbing. For ceilings in steamy areas, pair a mildew-resistant primer with semi-gloss paint to prevent peeling. (See our bathroom ceiling guide for more moisture-specific advice.)
Q: How do Sherwin-Williams Cashmere® lusters compare to flat, eggshell, and satin?
Cashmere® uses its own naming system. “Flat” is equivalent to matte, “Low Luster” is like eggshell, and “Medium Luster” compares to satin. Low Luster is great for bedrooms and living rooms, while Medium Luster works in high-traffic spaces. This system is unique to Sherwin-Williams but easy to match once you understand it.
Q: What’s the difference between wall paint, ceiling paint, and trim paint?
Wall paint is formulated to spread evenly across large surfaces and allow touch-ups. Ceiling paint is thicker, flatter, and designed to hide imperfections and reduce drips. Trim paint is harder and glossier to withstand scuffs, chips, and frequent cleaning. Using the right formula for each surface ensures longer-lasting results.
Q: Is there a special paint for doors and cabinets?
Yes—cabinets and doors need enamel paints that dry harder than wall paint. Products like Sherwin-Williams Emerald® Urethane Trim Enamel give a furniture-like finish that resists chips and stains. Using wall paint on cabinets or doors usually leads to peeling or early wear.
Q: Can you use exterior paint indoors?
No, and you shouldn’t try. Exterior paint is made to resist UV rays and weather changes, not indoor wear. It usually has higher VOC levels, which are unsafe for enclosed spaces. Stick with interior-specific paints for safety and performance.
Q: What’s the difference between washable and scrubbable paint?
Washable paint can be wiped down gently with a damp cloth. Scrubbable paint can withstand repeated, more aggressive cleaning without losing color or finish. If you have pets or kids, scrubbable options in satin or semi-gloss are the best investment.
Q: How long does low-VOC paint take to stop smelling?
Low-VOC paints usually lose most of their odor within 24–48 hours. In poorly ventilated spaces, the smell can linger longer. Open windows and run fans to clear the air faster. Even when dry, give fresh paint a few days before pushing furniture tight against the walls.
Q: Can you paint over oil-based paint with latex?
Yes, but prep is essential. Sand the surface lightly to remove gloss, then use a bonding primer. Once primed, latex paint adheres well. Skipping this step will almost always lead to peeling.
🎨 Color & Design Choices
Q: What colors make a small room look bigger?
Light, cool shades like pale gray, soft blue, and off-white help small rooms feel larger. Gloss or satin finishes reflect light and make spaces brighter. Painting trim and ceilings lighter than the walls also adds to the effect. Mirrors and good lighting enhance the illusion even more.
Q: Should I paint my ceiling the same color as my walls?
It depends on the effect you want. Painting the ceiling the same color creates a seamless, modern look that can make a small space feel bigger. A white ceiling adds contrast and height, which works well in traditional spaces. Both approaches are correct—it just depends on your design goals.
Q: How do I pick colors that flow throughout the whole house?
Choose a base neutral like greige, beige, or light gray and use it in most main areas. Add accent colors in bedrooms or dining rooms that complement the base tone. This creates variety while keeping a sense of continuity. Open-concept homes especially benefit from a cohesive palette.
Q: What’s the best color for a home office on video calls?
Muted tones like slate blue, sage green, or soft gray are flattering on camera. Avoid stark white (too bright) and very dark shades (too dull). Accent walls behind desks add depth without being distracting. (See our Best Paint for a Home Office guide for more inspiration.)
Q: Which paint colors help a room feel cozy?
Warm neutrals, rich greens, and deep tones like terracotta or taupe make rooms feel more inviting. A matte or eggshell finish softens the atmosphere. Cozy colors pair best with layered lighting and natural textures.
Q: What colors should I avoid if I’m selling my home soon?
Avoid bold shades like bright reds, purples, or neon tones. These turn off buyers who may not share your taste. Stick to light neutrals like greige, beige, or soft gray. Fresh, neutral paint appeals to the widest range of people and increases resale value.
Q: What accent wall colors work best in bedrooms?
Deep blues, forest greens, or charcoal tones add drama and depth. Place the accent wall behind the bed for a focal point. Lighter surrounding walls balance the boldness without overwhelming the space.
Q: Should trim always be white, or can it match the walls?
Trim doesn’t have to be white. Matching trim to wall color creates a modern, minimalist look. White or off-white trim remains timeless and frames wall colors well. Black or bold trim colors can add dramatic contrast.
Q: How do lighting and bulbs affect how paint looks?
Lighting changes everything. Natural light shows colors most accurately, but shifts throughout the day. Soft white bulbs emphasize warm tones, while daylight LEDs sharpen cool shades. Always test samples in different lighting before committing.
Q: What are the most popular interior paint colors in 2025?
Earthy neutrals like clay beige and sage green are trending. Warm neutrals are replacing stark grays, while deep navy and charcoal remain strong accent colors. Creamy whites continue to dominate kitchens and living rooms.
🔧 Tools & Supplies
Q: What tools do I need to paint a room myself?
At minimum, you’ll need brushes, rollers, painter’s tape, drop cloths, a paint tray, and a step ladder. A 2–2.5″ angled sash brush is best for cutting in, while a 9″ roller with the right nap works for most walls. Extension poles make ceilings easier and safer.
Q: Do I really need painter’s tape?
Painter’s tape helps create clean, crisp lines and prevents paint bleed. Experienced pros can cut in freehand, but most DIYers find tape worth it. Use a high-quality tape and press firmly to avoid seepage. Remove it while paint is still tacky for best results.
Q: What’s the difference between cheap and high-quality brushes?
Cheap brushes shed bristles, hold less paint, and leave streaks. High-quality brushes spread paint more evenly and make cutting in much easier. A good brush may cost more, but it saves time and improves results. Think of it as an investment you’ll reuse on future projects.
Q: What size ladder do I need for 8-foot ceilings? What about 10-foot or vaulted?
p ladder is usually enough. For 10-foot ceilings, an 8-foot ladder is safer. For vaulted or two-story spaces, multi-position ladders or scaffolding are best.
Q: Do I need scaffolding for tall walls or stairwells?
Not always, but for ceilings over 12 feet or staircases, scaffolding is safer and more efficient. It provides a stable platform for extended work. For standard bedrooms and hallways, a ladder is enough.
Q: What’s a 5-in-1 painter’s tool, and why is it important?
It’s a versatile tool that scrapes, spreads spackle, opens paint cans, cleans rollers, and more. Pros carry one on every job. It saves time by replacing several individual tools.
Q: What’s the purpose of a tack cloth before painting?
A tack cloth removes fine dust and debris after sanding or cleaning. Skipping this step often leaves bumps in the paint. They’re inexpensive and make a big difference in final smoothness.
Q: Can I use a foam roller for walls?
Foam rollers are better for doors, cabinets, or very smooth surfaces. They tend to leave bubbles on large walls. For walls, stick with fabric rollers matched to your wall texture. Learn more in our Everything You Need to Know about Foam Rollers article.
Q: Are paint kits worth buying, or should I buy tools separately?
For small one-time projects, paint kits are convenient and cost-effective. They usually include a tray, roller, and brush. For multiple rooms or repeat use, buying quality individual tools is better long-term.
Q: Do I need a special roller for textured walls?
Yes. Heavily textured surfaces need a thicker nap—½” to ¾”. Smooth walls do best with a ¼” to ⅜” nap. Using the wrong nap leads to patchy coverage.
🏠 Prep Work & Surfaces
Q: How do I repair nail pops before painting?
Tap the nail back into the stud, then drive a drywall screw slightly above or below it to secure the panel. Cover with spackle, sand smooth, and prime before painting. Simply spackling over the nail without securing it will cause it to pop again.
Q: What’s the best way to fix small wall cracks?
Hairline cracks can be filled with spackle or joint compound. For slightly larger cracks, use mesh tape over the crack before applying compound. Sand smooth and prime before painting.
Q: Can I paint over wallpaper, or should I remove it?
It’s best to remove wallpaper for long-term results. Painting over it often leads to bubbling or peeling. If removal isn’t possible, make sure the seams are glued down, apply a bonding primer, and use two coats of paint.
Q: Do I need to sand glossy walls before painting?
Yes. Glossy surfaces prevent paint from sticking. A light scuff sanding or liquid deglosser improves adhesion. Skipping this step often leads to peeling.
Q: How do I clean greasy kitchen walls before painting?
Use a degreaser or TSP (trisodium phosphate) solution to remove buildup. Rinse with clean water afterward so paint can adhere. Simply wiping with water won’t cut grease effectively.
Q: What’s the right primer for water stains or smoke damage?
A stain-blocking primer, often oil-based or shellac-based, is best. These seal stains so they don’t bleed through paint. Standard latex primer usually won’t cover tough stains.
Q: Can I paint over mold or mildew?
No. Mold must be treated and removed before painting. Painting over it only hides the problem temporarily. Use a cleaner with mildew remover, fix the moisture issue, then prime with mildew-resistant primer.
Q: Should I caulk baseboards and trim before painting?
Yes. Caulking fills gaps between trim and wall, creating a seamless look. It also prevents shadows that highlight imperfections. Use paintable latex caulk for the best results.
Q: How do I prep new drywall for paint?
Apply a drywall primer-sealer to even out porosity. This prevents flashing (shiny spots) where compound absorbs differently than paper. Once primed, paint as usual.
Q: Can I paint over paneling or wood trim without stripping it?
Yes, with the right prep. Clean, sand, and apply a bonding primer first. Then paint with a durable finish like semi-gloss. Skipping primer will lead to peeling on slick wood surfaces.
🎯 Application & Technique
Q: What’s the right order to paint a room: walls, trim, or ceilings first?
Paint ceilings first, then trim and doors, then walls last. This order prevents drips and splatters from ruining freshly painted areas. It also makes cutting in cleaner.
Q: How do I cut in straight lines without tape?
Use a high-quality angled sash brush and steady your wrist like you’re writing with a pen. Load the brush lightly and work slowly in short strokes. Practicing on less-visible areas builds confidence.
Q: How do I avoid roller streaks or lap marks?
Work in 3×3 foot sections and always roll into a wet edge. Use the right nap roller for your wall type. Avoid pressing too hard—consistent, even pressure is key. (See our roller streaks guide.)
Q: How many coats of paint do I really need?
Most walls need two coats for even coverage. Dark-to-light color changes may require primer plus two coats. Ceilings sometimes cover in one coat, but two are recommended for consistency.
Q: How long should I wait between coats of paint?
Follow the manufacturer’s directions—usually 2–4 hours between coats. High humidity can extend dry time. Painting too soon risks lifting the first coat and creating streaks.
Q: Why is my paint bubbling or peeling after the first coat?
Bubbling usually means moisture or poor adhesion. Peeling often happens when paint is applied over dirt, dust, or gloss without proper prep. Fix the cause, sand smooth, prime, and repaint. (See our guide on paint bubbling and peeling.)
Q: Should I box paint together before starting?
Yes. Pouring multiple gallons into one bucket (“boxing”) ensures color consistency. Even factory-mixed colors can vary slightly between cans. Skipping this step can result in noticeable differences on walls.
Q: Can I use the same roller cover for primer and paint?
You can, but it’s better to use separate covers. Primer and paint have different consistencies, and using the same roller can affect the finish. At minimum, wash thoroughly between uses.
Q: How do I keep brush marks from showing on trim or doors?
Use a high-quality brush or foam roller. Apply thin, even coats and avoid over-brushing. Enamel paints like Sherwin-Williams Emerald® Urethane self-level as they dry for smoother finishes.
Q: What’s the best way to paint behind radiators or tight spaces?
Use a radiator roller or a mini roller on a long handle. For very tight areas, a brush may be the only option. Planning ahead with the right tool makes these jobs much easier.
🐾 Lifestyle, Durability & Maintenance
Q: What’s the best paint finish for homes with kids?
Satin or semi-gloss finishes are best—they’re washable and resist fingerprints. Matte or flat paints may hide flaws but stain too easily. Kid-friendly rooms benefit from durable products like Sherwin-Williams Duration® Home.
Q: What’s the best paint for dog owners?
Choose washable or scrubbable paints in satin or higher sheens. Mid-tones hide scuffs better than pure whites. (See our guide to the Best Paint for Dog Owners for more advice.)
Q: How long does interior paint typically last?
In low-traffic areas, quality paint can last 7–10 years. Kitchens, bathrooms, and hallways may need repainting in 3–5 years. Longevity depends on finish, cleaning, and exposure to wear.
Q: How soon can I clean freshly painted walls?
Wait at least two weeks before cleaning freshly painted surfaces. Lightly wipe with a damp cloth—no harsh scrubbing. Cleaning too early can damage uncured paint.
Q: What’s the easiest paint to wipe clean?
Semi-gloss and satin finishes are easiest to clean. They resist stains and withstand scrubbing better than flat or matte. Use mild soap and water for routine cleaning.
Q: How do I protect painted walls from scuffs and fingerprints?
Choose durable finishes in high-traffic areas and place furniture slightly away from walls. Wash gently with a damp cloth when marks appear. Some homeowners also use clear wall protectors in problem spots like stairwells.
Q: Is matte paint okay if I have pets?
It depends on the room. Matte paint hides imperfections but shows stains and smudges. For living rooms and bedrooms, it may work, but in high-traffic pet areas, satin is better.
Q: How often should I repaint high-traffic areas like hallways?
Every 3–5 years, depending on scuffs and wear. Choosing a satin finish can extend that timeline. Regular touch-ups also keep hallways looking fresh between full repaints.
Q: Do darker colors show wear faster than light colors?
Yes. Dark paints show dust, scratches, and scuffs more easily. They may also require more frequent touch-ups. Lighter neutrals are more forgiving.
Q: Can I touch up just one wall, or will it look different?
You can, but results vary. Even the same can of paint may look slightly different if applied months later. Feathering edges and blending carefully improves results. For large areas, repainting the whole wall is often safer.
📅 Project Planning & Hiring
Q: How long does it take to paint a standard bedroom?
For a DIYer, a 12×12 bedroom can take a full weekend, including prep, two coats, and cleanup. A pro team can often complete it in half a day. Ceilings, trim, and repairs add time.
Q: Can I paint in winter, or should I wait until spring?
Yes, you can paint in winter as long as indoor conditions are right. Keep temperatures between 50–85°F and ensure good ventilation. Low-VOC paints make indoor painting safe year-round.
Q: How much ventilation do I need when painting indoors?
Open at least one window per room and run a fan to circulate air. Point fans outward to vent fumes. Even with low-VOC paints, good airflow speeds drying and improves comfort.
Q: How much paint do I need for a 12×12 room?
One gallon covers 350–400 square feet. A 12×12 room with 8-foot ceilings has about 350–400 square feet of wall area, so two gallons are usually needed for two coats. Primer adds extra if required.
Q: Should I DIY or hire a professional painter?
It depends on the scope and your comfort level. Small bedrooms or accent walls are manageable for DIY. Whole homes, tall ceilings, and detailed trim are best left to pros for efficiency and quality. (See our section on DIY vs Hiring a Pro.)
Q: How do I estimate the cost of painting my house interior?
Multiply your square footage by the cost of paint per gallon, then add supplies. A 2,000 sq. ft. home may need 6–8 gallons plus primer. Professional painters charge by square foot or room, usually $2–$6 per sq. ft.
Q: What should I look for when hiring a painter?
Check for insurance and references. Ask about products they use, prep work included, and warranties. Good pros provide written estimates and clear timelines.
Q: Do painters move furniture, or do I need to do it first?
Most pros move small furniture and cover it, but heavy or fragile pieces may need to be moved beforehand. Ask during the estimate so expectations are clear. DIYers should plan to clear as much as possible.
Q: Do painters bring their own supplies, or do I need to provide them?
Professionals bring their own tools, ladders, and most prep supplies. Some may allow homeowners to supply paint if preferred, but pros often get better pricing. DIYers will need to purchase or rent everything.
Q: What’s included in a professional paint job?
A quality job includes prep (cleaning, patching, sanding), protection of furniture and floors, priming where needed, and applying two coats of paint. Cleanup and touch-ups are also standard. Many pros also offer a short warranty period for adjustments after the paint cures.